Your e-Business Quality Partner eValid™ -- Automated Web Quality Solution
Browser-Based, Client-Side, Functional Testing & Validation,
Load & Performance Tuning, Page Timing, Website Analysis,
and Rich Internet Application Monitoring.

eValid -- Validating an Object Property
eValid Home

Summary
This page explains the steps needed to validate the contents of an object using its known name and value property. This example involves 16 steps needed to make the eValid recording, which results in a script that has about 8 essential commands total.

Example Goals
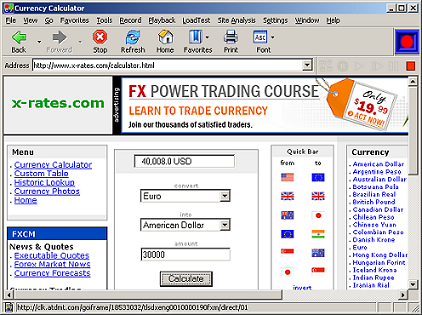
Here is an example using www.x-rates.com's webpage containing objects to CALCULATE currency conversion rates. [NOTE: The script's property values will fluctuate due to real time currency exchange rates.]

Script Development Process
To develop the currency calculation script and validate the value property please perform the following test steps:
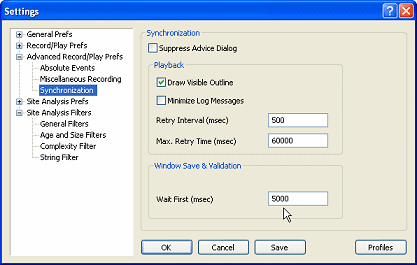
  1. Set Synchronization Window Delay...
    The script will eventually do a synchronization on a DOM object, but in case this fails, you need to make sure of your synchronization settings:

    Image of Settings Showing Delay

  2. Go to "www.x-rates.com"...
    This is the page where you're going to be entering data values to convert.

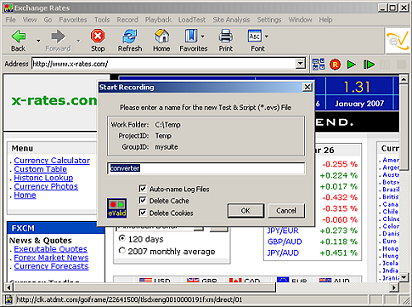
  3. Start Recording, and choose the script filename, i.e. "converter"...

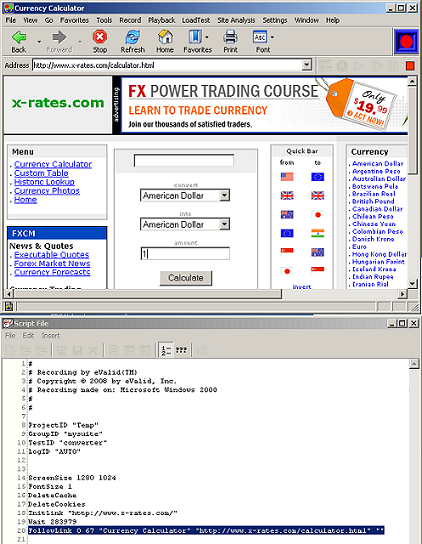
  4. Click the "Currency Calculator" link under the Menu section of the webpage...

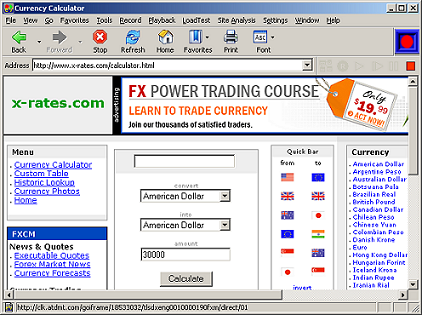
  5. Enter the "amount" field for conversion rates, i.e. 30000...

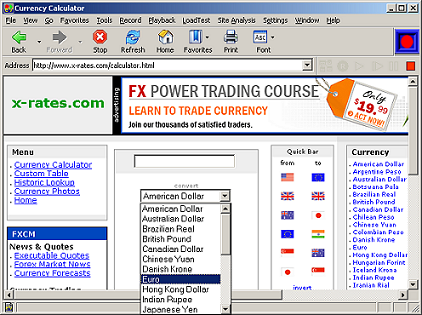
  6. Select the target currency from the "convert" field's list, i.e. Euro...

  7. Click on the "Calculate" button...

  8. Set up the PAGEMAP Steps
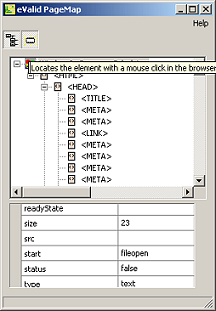
    To include a validation on the resulting value, proceed to eValid's PAGEMAP window, enable with a LEFT Click the "Locates the element with a mouse click in the browser" toolbar option...

  9. Select the Validation Target Object
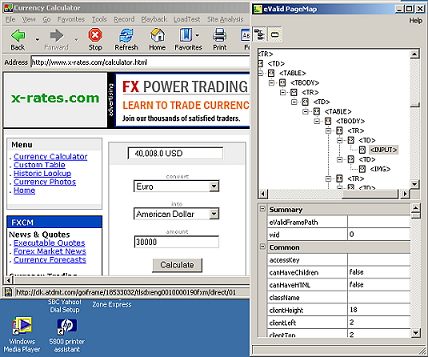
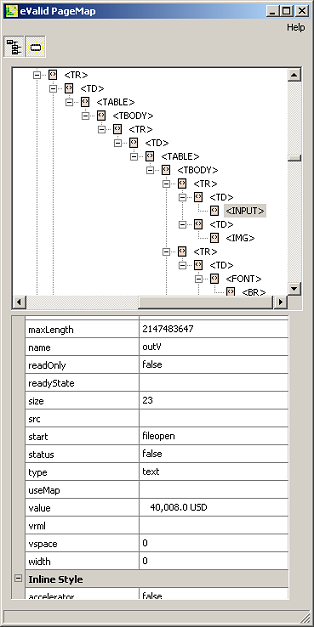
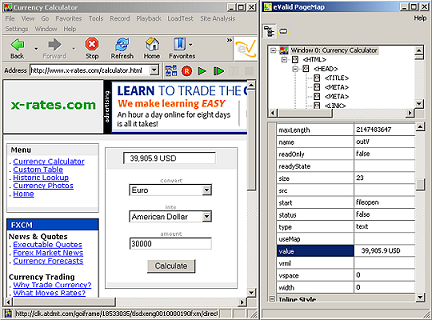
    Now, let's maneuver the PAGEMAP's tree to display the properties for the resulting conversion amount by RIGHT Clicking on the intended element/object in the browser, i.e 40,008.0 USD field/box...
    [NOTE: You can RIGHT Click on the bottom section of the PAGEMAP to introduce a scrollbar to locate the particular NAME and VALUE assignments, etc.]
    [NOTE: The conversion rate changes daily; these were the rates in effect at the time this page was last edited.]

  10. Assign the Validation Steps
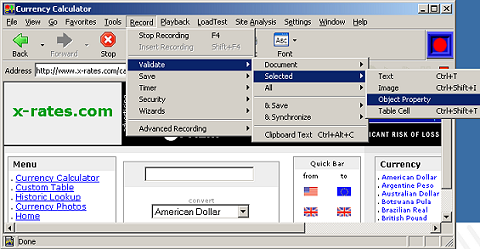
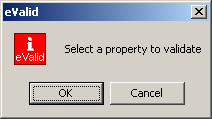
    Select eValid's Record->Validate->Selected->Object Property feature to script the required verification point, and proceed with "OK" only after a modal window signals you to "Select a property to validate"...

  11. Select the Property
    From the displayed Input(Common) section in the PAGEMAP's bottom window, LEFT click on the left column containing "name" to select the element/object's corresponding properties from which to validate on, i.e. like the field/box containing the "name" identifier's value of "outV"...

  12. Continue the Validation Selection
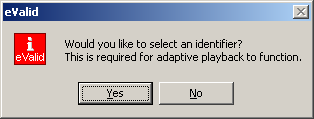
    Next, we need to identify the corresponding "value" assigned to the chosen "name" property on the PAGEMAP, you will be prompted by the following modal window, please click "Yes" to proceed...

  13. Select The Identifier
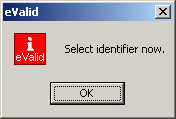
    Identify the corresponding "value" with a LEFT Click in the left column on the PAGEMAP's bottom Input(Common) section, Click on "Yes" when ready to begin your identification...

  14. Inspect Field Value for Completeness
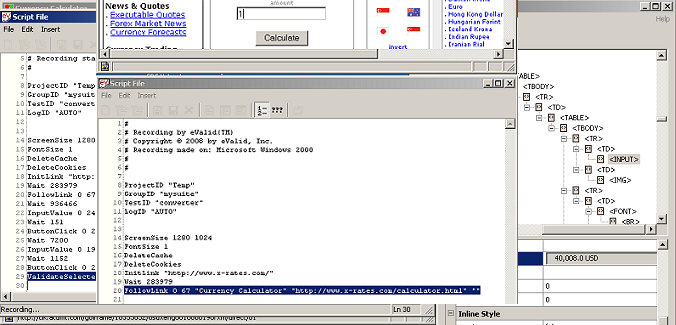
    After clicking on the selected identifier, the PAGEMAP displays corresponding properties and generates the Script File command entry from which to validate, i.e. the field/box containing "40,008.0 USD"... Note that the command just added is highlighted in the display below:

  15. Stop Recording...

  16. Alternative Method
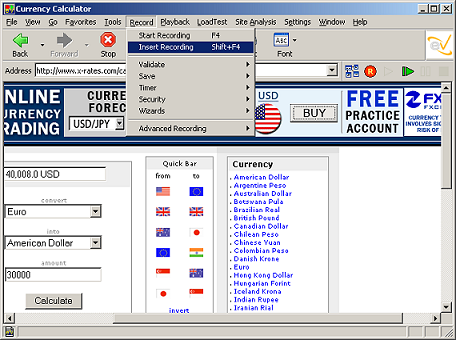
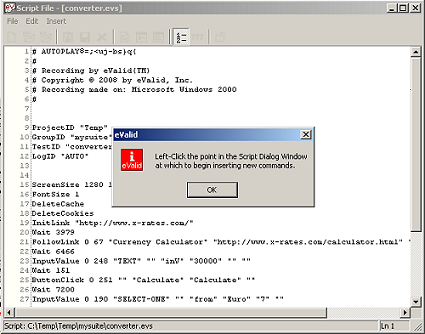
    You can also insert verification points after completing a record session using the following feature and repeat Step 9 through Step 15:

  17. Play Back Your Script
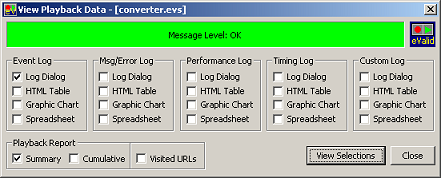
    You should yield a PASSing GREEN flag...

  18. View Event Log
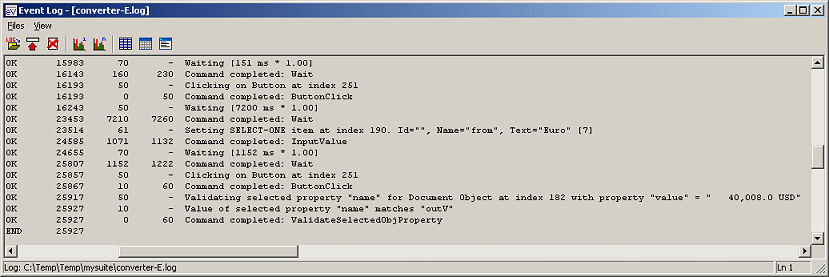
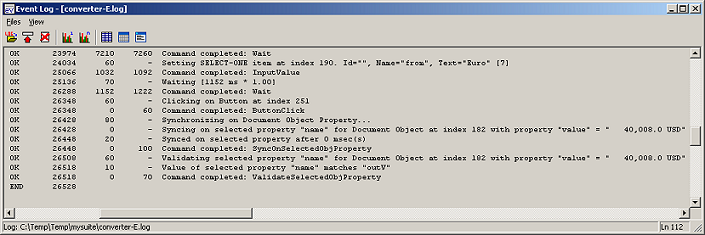
    Your event logfile -E.log will contain the following all OK status outputs...

  19. Manual Validation Confirmation Process
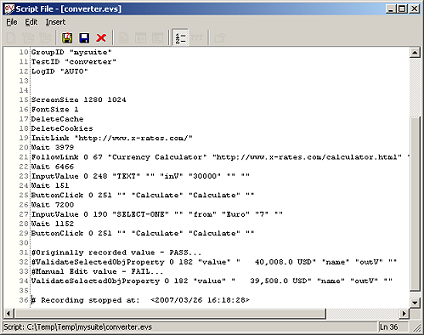
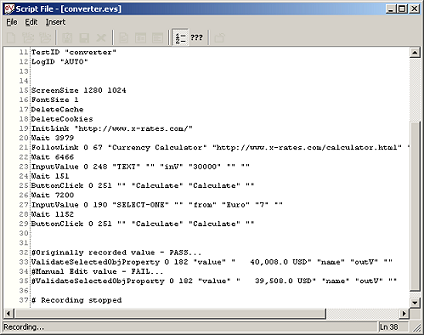
    If you wish, you can manually edit the script to verify that the validation works as intended. For example, let's manually edit the "converter.evs" file so that we can see what happens when the selected verification point [value] changes and/or is NOT FOUND (look at lines 31-34 in the script shown at the end of this explanation).

  20. Verification of FAILure Mode
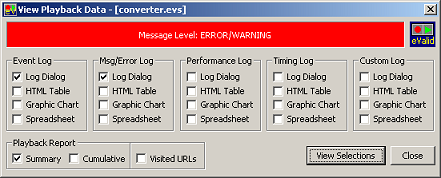
    Having modified the "ValidateSelectedObjProperty" script command(s) to a different value assignment yields a FAILing RED flag, as intended upon subsequent PLAYBACK...

  21. View Error Messages
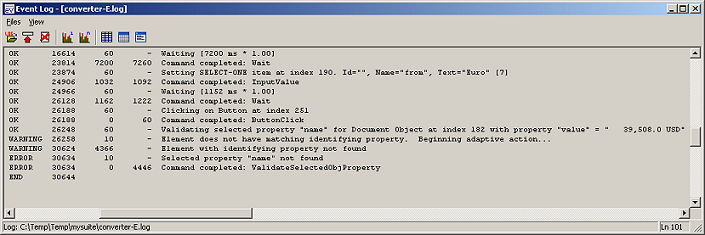
    Your event logfile -E.log now contains the WARNING and ERROR status outputs...

  22. Synchronization Issues
    For scenarios where network speed factors introduce lengthy calculation responses from the server side, you can simply manually edit the .evs to include additional synchronization points. Using the "SyncOnSelectedObjProperty" script command allows you to makes sure of the availability of a value in the DOM object when calculations take longer during PLAYBACK.. [Please note the slight script differences between line 33 and line 36, in the AFTER window.]

    BEFORE...

    AFTER...
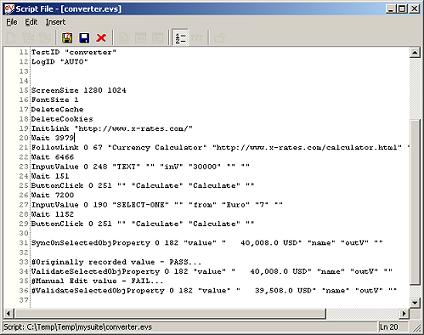
  23. Confirmation of Synchronization
    Your event logfile -E.log now contains the additional "OK" showing synchronization status...

  24. Alternatively, Confirmation of Synchronization FAILure
    Your event logfile -E.log will contain WARNING and ERROR synchronization status outputs...

  25. Example Script
    Here is the eValid script that shows the results of this recording process.
    CAUTION! You will probably have to modify the "value" accordingly, as this page and/or environments may differ from the initial creation point!